Fix – Windows 10/8/7 Won’t Sleep
PC Problems, Windows 10, Windows 7, Windows 8, Windows 8.1When your Windows 10/8(8.1)/7 embraces a state of insomnia, you can bet things are not looking good for your system. No matter what you do, how hard you try; your computer behaves worse than a 5 year old and simply refuses to take a nap.
For common PC issues, Junk files unclogging, boosting System performance, speeding up Internet and other underlying Windows concerns, we recommend using this tool.
- Step 1 : Download Systimizer ‒ PC Cleaner & Internet Booster (Effective with Windows 10, 8, 7 & XP)
- Step 2 : Click "Scan" to analyze your PC
- Step 3 : Click "Fix" to wipe out all bumps
In this article, you will be shown how to put your stubborn PC to sleep and give rest to its watery eyes.
Check Power Settings
Start your mission by doing the obvious; check your power settings. While clicking the Sleep option should slumber your PC off to dreamland, those settings can unfortunately change. Ensure everything is in perfect order by doing the follow:
- Popup the Start menu/screen by pressing Windows key
- Type power options and press Enter
- Click Change plan settings listed alongside your chosen power options (typically Balanced)
- In Edit Plan Settings box, select Change advanced power settings located at the bottom
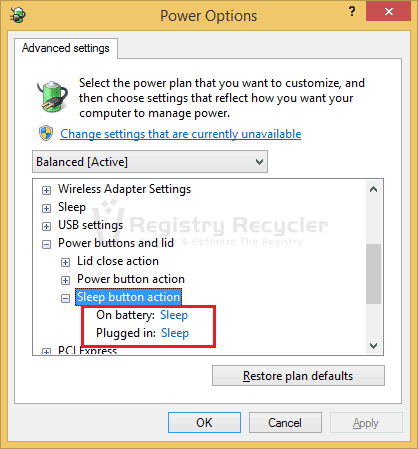
- On the Power Options window scroll down to reach Power buttons and lid, expand the option
- Click plus (+) against Sleep button action
- Ensure the options are set to Sleep
Furthermore you can force your PC to sleep while someone is accessing your system’s shared media by perusing the instructions beneath;
- From the Power Options screen, expand Multimedia settings
- Further expand When sharing media
- Change the settings from Prevent idling to sleep to Allow the computer to sleep
 Pressing the Sleep button is normally not required to force the sleeping functions. After all, the computer should automatically rest when there is minimal disk activity. Nonetheless, it is a good starting point.
Use powercfg command-line
Windows comes with a handy investigative tool to highlight the problematic germ triggering the sleeplessness disease. To monitor the power resources used by various components, use three useful powercfg commands demonstrated here:
Powerfcg.exe /energy
- On the Start menu/screen, type Command Prompt
- Right-click the command prompt icon and choose Run as administrator from the menu
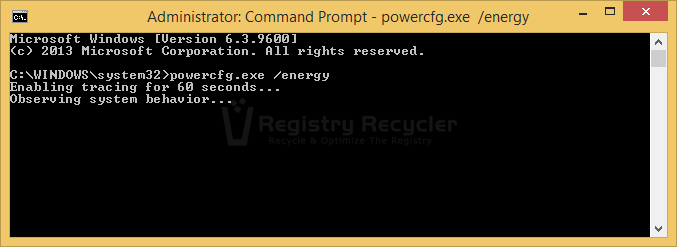
- In the elevated window, type powercfg /energy and hit Enter
- Wait while the system observes power behavior
To read the generated report, go to System32 folder under the Windows directory, and open the file energy-report.html using your favorite browser. This information will list all power-management errors residing in your computer, and possibly identify the one leading to sleep disorders.
Powercfg.exe /requests
In addition, you can list components making power requests and ensure no abnormal behavior is encountered. To do this, do the following:
- Open Command Prompt with administrative rights
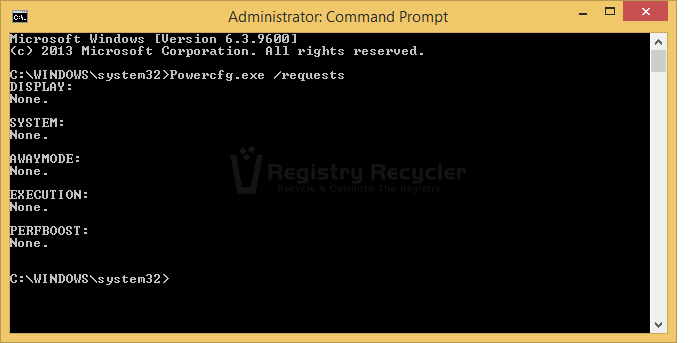
- Run powercfg /requests
This will show you all applications and drivers querying power resources. Ensure no device is making irregular requests that is keeping your PC awake.
Powercfg.exe /devicequery wake_armed
Similar to the above method, this command will highlight devices responsible for waking up the machine:
- Launch Command Prompt (Admin)
- Run powercfg /devicequery wake_armed
Disable devices to wake the computer
Regardless of whether you have pinpointed the error-triggering module, ensure correct device settings on all modules from the Device Manager:
- Access Start menu/screen (Windows key)
- Type Device Manager and enter
- Right-click each device and choose Properties
- Click Power Management tab
- Uncheck Allow this device to wake the computer
Disable IPv6
IPv6 is known to conflict with sleep options and make your perfectly healthy box an insomniac patient. To verify if this latest Internet Protocol version is the root to your trouble, disconnect any Ethernet card/device from your machine and notice for any errors. If removing the component aided your PC to peacefully fall asleep, re-plug the adapter/card and try disabling IPv6 for it from TCP/IP settings:
- Open Start menu/screen
- Type view network connections and click it
- Right-click Ethernet adapter causing the issue and choose it’s Properties
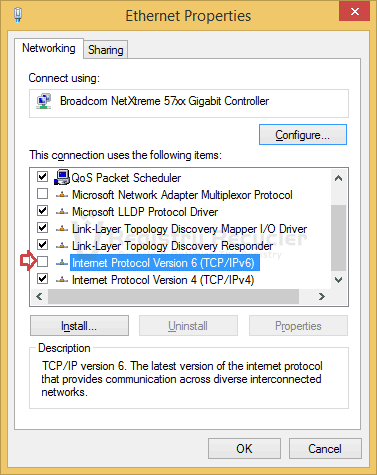
- Scroll down to Internet Protocol Version 6 (TCP/IPv6) and deselect it
- Click OK
Abandon Homegroup
Homegroup is a perfect platform to share media and other resources across multiple PCs connected to the home network. Unfortunately, this tool is infamous for creating interference and stopping the computer from dozing off. The simple work around to this issue is to leave Homegroup:
- Click Start button to open Start menu/screen
- Type homegroup and press Enter
- Select Leave the homegroup
- Click Finish
The resolutions mentioned in this article are the closest fix to Windows 10/8.1/8/7 PC sleeping disorders. However, if they did not treat your PC accordingly, ensure all applications and programs are closed. Any process, background or up-front can resist the OS to shut its eyes and drift into darkness.


 How to Speed Up Your Internet in Windows 7
