Those who have already upgraded their machines to Windows 8.1 from either Windows 8 or other previous versions, they would still be trying to settle down with it. Although, Microsoft has duly addressed the user response on Windows 8, yet these users are concerned on adaptability. Anyhow, the developer cannot undertake the requirements of each user. However, users are advised to take initiative by their selves to enhance Windows 8.1 performance and customize their operating system as per their own yearnings.
For common PC issues, Junk files unclogging, boosting System performance, speeding up Internet and other underlying Windows concerns, we recommend using this tool.
- Step 1 : Download Systimizer ‒ PC Cleaner & Internet Booster (Effective with Windows 10, 8, 7 & XP)
- Step 2 : Click "Scan" to analyze your PC
- Step 3 : Click "Fix" to wipe out all bumps
Your presence on this page shows that you have also arrived to the Windows 8.1 family. You can use some guidance to crystalize your experience with this updated operating system. Read through the references described below and make use of these.
As the tips given below are concerned with Windows registry, let us show you how to access it.
- Press Windows key on your keyboard to access Start screen
- On this screen type regedit to initiate a new Start search
- Click Regedit in search results and confirm the UAC message to open Registry Editor
Note: To perform these directions, you would need to access and edit your Windows Registry database. Be cautious while reading and applying, and do not forget to back up your current registry settings. Read through the guide on accessing and editing registry, in order to avoid any inconvenience.
Disable Windows Store
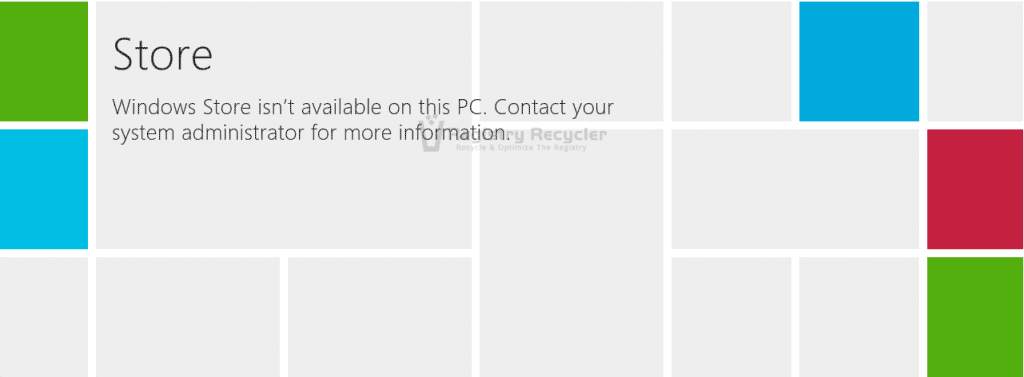
If you think that you have to use this new version of Windows officially without the support of Windows Store, you can turn off this feature to free up some memory. The complete process for doing so is written below.
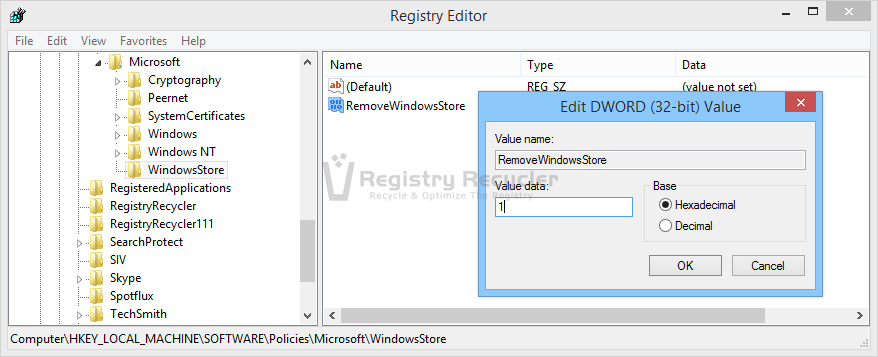
- Go to Registry Editor and expand through HKEY_LOCAL_MACHINE to reach the key below
- SOFTWARE\Policies\Microsoft\WindowsStore
- If WindowsStore does not exist under Windows key, create a new one and name it as WindowsStore
- Now create a New DWORD Value and name it as RemoveWindowsStore
- Double click this Value to Modify
- Change the Value data from 0 to 1
Once the Windows Store is blocked, you would definitely not need its concerned services. Turn off these services too for unloading the extra burden from your system resources. For this purpose,
- In Registry Editor, expand HKEY_LOCAL_MACHINE to get the end key below
- Now access SYSTEM\ControlSet001\Services\SystemEventsBroker
- Locate and Modify the value named Start. Change its Value data to 4
- Now go to SYSTEM\ControlSet001\Services\TimeBroker
- Locate and Modify the value Start by changing its Value data to 4
- Now reach for SYSTEM\ControlSet001\Services\WSService
- Locate and Modify the value named Start. Deactivate it by setting its Value data to 4
Windows Store along with its pertinent services will not show up from now on.
Lock Screen Timeout
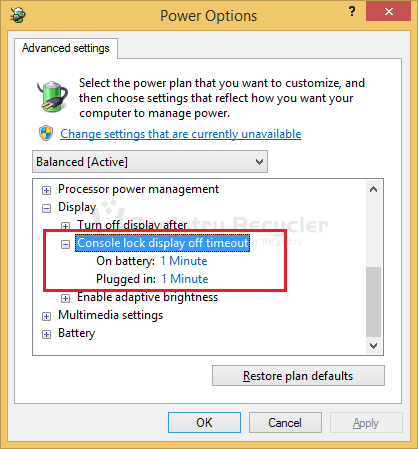
If you think that the lock screen of your Windows 8.1 times out too quickly and it should stay a bit longer, you can change this behavior to your preference. The default time for such timeout is 1 minute or 60 seconds. Go to the registry and modify the setting to increase this time limit. To do so,
- Navigate through HKEY_LOCAL_MACHINE in the right pane of Registry Editor and go to the key:
- SYSTEM\CurrentControlSet\Control\Power\PowerSettings\ 7516b95f-f776-4464-8c53-06167f40cc99\ 8EC4B3A5-6868-48c2-BE75-4F3044BE88A7
- While the above key is selected, locate Attributes value in the right pane
- Modify this value and set the Value data to 2
- Click OK to save the changes
Disable Lock Screen
Lock screen is basically an image that welcomes you whenever the system is turned on or wakes up from sleep mode. Some people find it refreshing, while some feel irritated due to the number of clicks to access login session. The screen can simply be deactivated and bypassed to view the login screen at first place. To do so,
- Expand through HKEY_LOCAL_MACHINE in Registry Editor to reach the following key
- SOFTWARE\Policies\Microsoft\Windows
- Right click Windows to create a New key and name it as Personalization
- Let the Personalization key be selected, and locate value named NoLockScreen in the right pane
- Double click to Modify the value and set its Value data to 1
- Click OK to save changes
Disable Charms Bar
Charms bar is one of the basic features of Windows 8, as well as Windows 8.1. and works quite sufficiently while operating a touch screen device. However, users of PC or lap may not agree to this. Operating the cursor can bring up the Charms bar frequently and unintentionally. Perform the following actions to prevent this functionality.
- Expand through HKEY_CURRENT_USER and navigate to the following concerned key
- Software\Microsoft\Windows\CurrentVersion\ImmersiveShell
- Right click ImmersiveShell and create a New Key, naming it as EdgeUI
- Now in the right pane, create the value DisableCharmsHint and double click to Modify it
- In the field next to Value data, replace 0 with 1, and click OK button
- The next value to be created is named as DisableTRcorner
- Modify it, set the Value data of this key as 1 and click OK button
- No go for another new value named DisableTLcorner
- Modify the Value data to set it as 1 and click OK button to save changes
Bypass the Start Screen
By default, when a user signs in to Windows 8.1, he/she is being taken to the Modern UI Start screen. Although, this feature is new and compelling, some users do not like it this way. If you are also the one, who prefers to stick with the Desktop screen and want it as the initial display, see the following instructions.
- Navigate through HKEY_CURRENT_USER and search for the last key in order stated below
- Software\Microsoft\Windows\CurrentVersion\Explorer\StartPage
- Right click StartPage key to create a New DWORD Value and name it as OpenAtLogon
- Modify OpenAtLogon to set the Value data as 0 and click OK button.
In order to see the effects of changes you just made, you must have to restart the computer. Starting with bypassed lock screen you will observe each change at its due.
Show/Hide Hidden Files, Folders and Drives
Although there is another way to show or hide files, folders and drives in Folder options. You are sometimes unable to access and make changes in the standard way. For such an occasion, it is suggested to change the setting through Windows registry in the following manner.
Files and Folders
- Expand through HKEY_CURRENT_USER in Windows Registry Editor to find:
- Software\Microsoft\Windows\CurrentVersion\Explorer\Advanced
- On the right side, locate the DWORD values named Hidden and ShowSuperHidden
- Double click both the values, each at a time to and change the Value data to 1
- Click OK button
Drives
- Stay on the same address path within Registry Editor as above
- Find the value named HideDrivesWithNoMedia and Modify its Value data to make it 0
- Find the same value in the following path and assign a Value data of 0
- HKEY_LOCAL_MACHINE\SOFTWARE\Microsoft\Windows\CurrentVersion\Explorer\Advanced
System Files
- In HKEY_LOCAL_MACHINE of Registry Editor, find the key:
- SOFTWARE\Microsoft\Windows\CurrentVersion\Explorer\Advanced\Folder\SuperHidden
- Find the values DefaultValue and CheckedValue on the right, while SuperHidden is selected
- Modify both the stated values, and give the Value data as 1 and 0, respectively
Sort Apps on Start Screen
The renovated Start screen of Windows 8.1 has brought up much flexibility this time. Users have been heard complaining about the live applications that are already found, while logging on for the first time. The system allows you to replace these with the desktop applications of your own use, displaying at the first instance. Moreover, you can also customize your Start screen to exhibit APPS view, every time you access it.
Desktop Apps listed first
- Open Registry Editor and navigate to the following key through HKEY_CURRENT_USER
- Software\Microsoft\Windows\CurrentVersion\Explorer\StartPage
- Right click StartPage key and choose New to create a DWORD Value
- Name the value as DesktopFirst and Modify it for the Value data be 1
- Click OK button to save and exit
APPS View
- Stay on the same location and create a new DWORD Value named MakeAllAppsDefault
- Double click the value and put 1 in the field next to Value data
- Click OK
The next time you install a program, check out the directory path you have given in the above steps and easily access the files of your installed application. Each of the above tweak may require a proper reboot in order to take effect. However, you can restart the system only once, when all the desired modifications are done.


 Fix WiFi Connectivity Issues in Windows 10 & Windows 8(8.1)
