Fix BAD_POOL_CALLER Stop Error (0x000000C2) in Windows 8.1
PC Problems, Windows 8.1Witnessing your Windows 8.1 system failing prey to yet another one of the Blue Screen of Death errors is anything but pleasant. Denoted by the value 0x000000C2 or simply 0xC2 , BAD_POOL_CALLER is a specific BSOD stop error that appears when a thread in the processor makes a bad pool request. This means that it is asking the system to use resources that are either unavailable, nonexistent, or simply under use by another thread. Upon failing to load the desired file, the PC runs into various errors and ultimately performs a reboot in an attempt to protect itself from any damage. However, the user is still left fetching the unsaved work, and cursing the computer along the way.
For common PC issues, Junk files unclogging, boosting System performance, speeding up Internet and other underlying Windows concerns, we recommend using this tool.
- Step 1 : Download Systimizer ‒ PC Cleaner & Internet Booster (Effective with Windows 10, 8, 7 & XP)
- Step 2 : Click "Scan" to analyze your PC
- Step 3 : Click "Fix" to wipe out all bumps
If you are encountering frequent system shutdowns owing to this fatal error, it is advised you do not overlook the gravity of this issue and immediately perform the troubleshooting steps listed in the section below.
Solutions
While sometimes, 0x000000C2 may be fixed by a simple reboot; in most cases it requires special diagnostic steps. This section looks deeper into these detailed methods and helps you resolve the matter in a correct and appropriate manner.
Analyze your Minidump file to find the root cause
As is the case for any BSOD error, 0xC2 saves an error report in the system drive (typically C) for future analysis. This .dmp file notes the corresponding processes that occurred during the crash, and allows the user to pinpoint the driver or application making the invalid call and thus ceasing the computer operations. That element can be either updated or reinstalled to fix the problem.
Note: To read minidump files, you will need to install a Debugging Tool, such as WinDbg available from Microsoft’s official website.
Here’s a simple guide to help you find and interpret .dmp files immediately after you recover from a PC crash:
- Open Run box (Windows + R) and type %systemroot%. Enter to launch your Windows directory
- Navigate to Minidump folder
- Open the recent .dmp file and notice the error labeled as BAD_POOL_CALLER
- Look for the flawed component listed under the Probably caused by wordings, or other similar sentence
- Once identified, get the latest updates or reinstall the program to inhibit any further issues
Sometimes, users are not able to view the Minidump folder and thus fail to scrutinize BSODs. This can be fixed by configuring the computer appropriately to generate .dmp files and save them in the targeted path. Proceed with the steps illustrated:
- Reach Windows directory from the Run box as described above
- Look for Minidump folder. If not found, right-click anywhere in the explorer, hover over to the option New, and then choose Folder to create a new folder
- Name the folder Minidump
- Open System console by pressing Windows + Pause key. Click Advanced system settings from the left pane to open System Properties
- View the Advanced tab and click Settings button displayed in the Performance box
- Open Advanced view from the top and click Change button
- Ensure the option Automatically manage paging file size for all drives is checked.
- Click OK to close Performance Options box
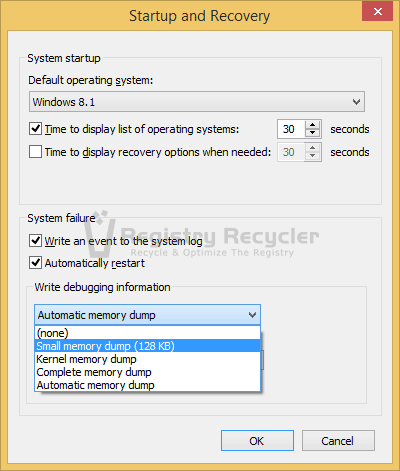
- Navigate to the System Properties again and choose Settings listed under Startup and Recovery
- Under System failure, ensure check mark against Write an event to the system log.
- In Write debugging information section and choose Small memory dump (128 KB) option
- Also confirm the Dump file path is set to %systemroot%\Minidump
- Click OK once done
Interpreting dump files and mending the identified constituent is the best way to troubleshoot BSOD. However, if your problem persists, you can still enjoy a better computing experience by performing the following resolutions.
Install the latest driver updates
Drivers are the communication link between your OS and the hardware device, and form the real backbone for your system. However, as mentioned above, corrupted or outdated drivers are one of the leading causes of 0xC2 glitches.
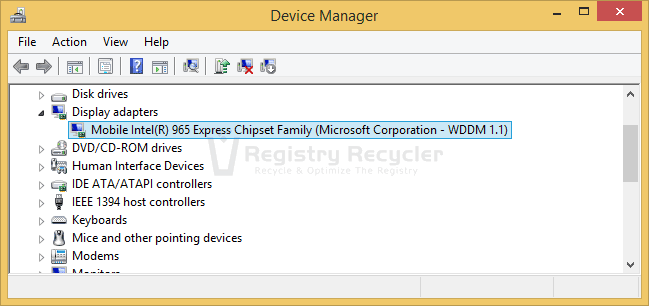
If you failed to determine the problematic driver from the method explained earlier, you can still individually check and install the latest versions for all drivers using the Device Manager tool as described below:
- Press Windows key and type Control Panel.
- Click Control Panel displayed in search results
- Choose Hardware and Sound and then click Device Manager displayed under Devices and Printers
- From the list of hardware categories, navigate to the one you need to update
- Right-click on the device, choose Update Driver Software and then follow the instructions
Restore to an earlier point in time
One of the most common reasons attributing to any stop error is recent alterations made to the system files and settings. Whether it’s a recently installed game, a security app or a newer graphics card driver; all these changes may deny your PC from running smoothly and working steadily. In cases like these, it is always best to return your system to a previously created restore point and undo all recent amendments.
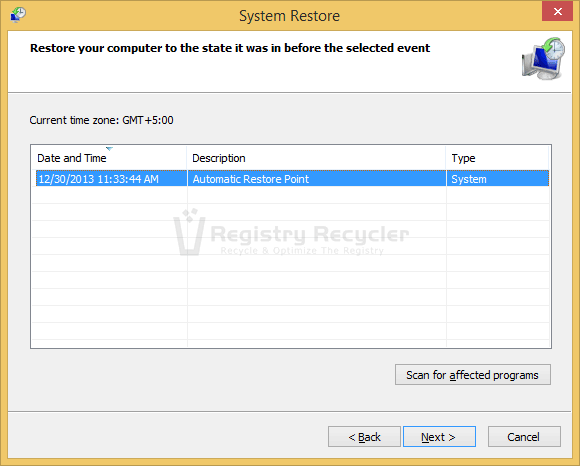
Accomplish this by using the System Restore tool in Windows 8.1:
- Press Windows + X key and then click Search
- Type Control Panel in the search box and select it from results
- Once opened, type Recovery in the Control Panel search box
- Locate and click Recovery from the search results
- Select Open System Restore from the list of Advanced recovery tools.
- System Restore window will be displayed
- Click Next, and then select a recent recovery point. Click Next
- Confirm your decision by hitting Finish.
- You will be presented by a dialog box stating Once started, System Restore cannot be interrupted. Do you want to continue? click Yes to let the system execute the instructions
Fix corrupted system files
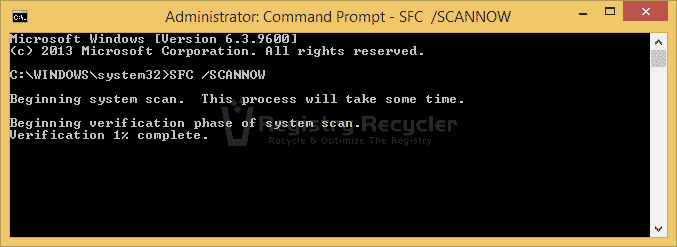
As formerly stated, 0xC2 can occur when the system fails to locate a specific file. This missing or corrupted file can be fixed by running the system file checker tool demonstrated underneath:
- Enter Start screen (Windows key) and type command prompt
- Right-click Command Prompt and choose Run as administrator
- Type sfc /scannow and hit Enter
- Allow the PC to scan for any missing or corrupted files and repair them automatically
Note: If prompted, just insert the Windows 8.1 installation disc as the system will extract the desired files from the installation media on its own
Perform a System Refresh
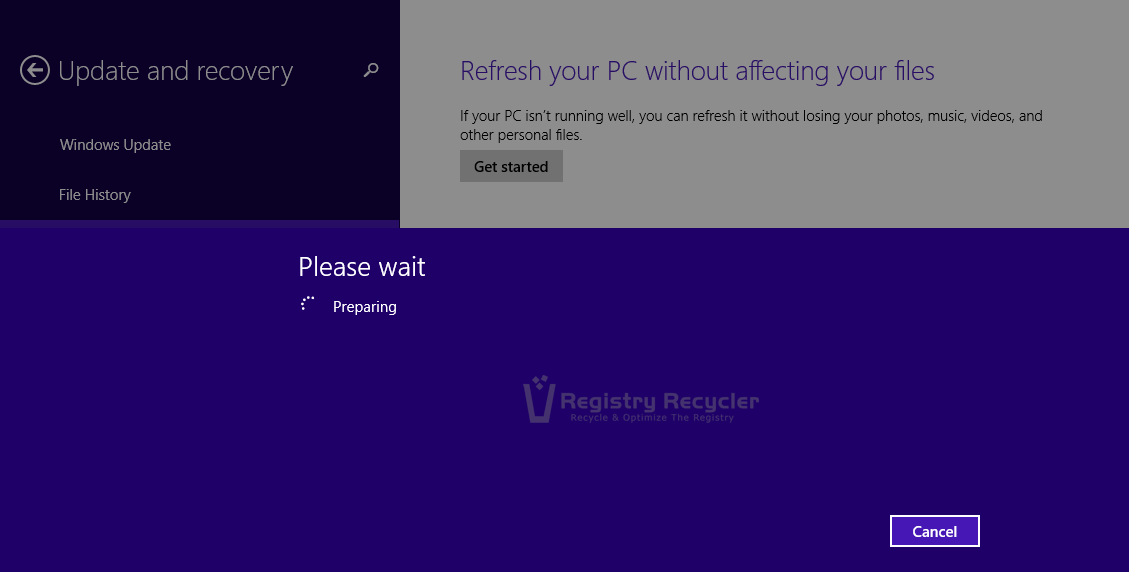
While debugging BAD_POOL_CALLER may be difficult in other Windows versions, Windows 8.1’s Refresh feature makes the task relatively easy. Refresh your PC is a tool incorporated into this latest OS that reinstalls Windows, but keeps personal files and settings intact. If performing driver updates, or fixing corrupted files didn’t work for you, you can refresh your Windows and see if it helps.
- Open Charms bar by pressing Windows + C key and select Settings
- Click Change PC settings
- Navigate to Update and recovery and choose Recovery
- Under Refresh your PC without affecting your files, click Get started. The wizard will guide you through the remaining procedure
This will refresh your installation of Windows 8.1 and reinstate any missing/corrupted files likely causing the fatal error.
In case you are still facing 0xC2 error after performing a refresh, you can always Reset your PC using the Windows 8.1 Reset feature. This will completely nuke your system and dissolve all personal settings and files. Rest assured, your BAD_POOL_CALLER fault will certainly be fixed by this utility.
To use the PC Reset function, carry out following steps:
- Open charms bar by pressing Windows + C key and then choose Settings
- Select Change PC Settings and navigate to Update and Recovery.
- Click Recovery
- Under Remove everything and reinstall Windows, click Get started
- Continue with the onscreen directives
 Interpret AMI BIOS Beep Codes at Startup
